Wednesday, February 22, 2012

Buying snowboard boots


I just entered my 3rd year of snowboarding. I started pretty late, but to be honest, it means nothing, if you want to do it, just do it.

First piece of equipment I bough were snowboard boots. I have a bit wider feet so researched a bit and figured out that I would be OK with Burton MOTO. They are entry level, can be found everywhere and fit into basic price category. Additionally I bough them used, they were almost new, been put on maybe 2-3 times. Person sold them since they were to small for him. Size was 42.5.

During these 20+ days of snow I had pain in my feet after some time and with more and more riding pain was more pronounced. I worked on my riding style, I tried SuperFeet inserts and eventually made custom feet inserts, but did not help much. My heel always had extra space even if I would made boots extremely tight. 

Eventually I have decided to change boots and really spend some time while choosing. I talked to some friends and and come up with buying strategy. 

Here it is:
1. You need to block a lot of time. take all time you need. no rush or hurry. At least 1 hour.
2. Don't buy online, you need to try it and compare the fit
3. Choose a store with multiple brands. Don't go to store that has for example 10 Burton models or 10 DC models, choose store that has at least 4,5 different brands with different lacing systems. This is important since each brand has different fit. Nike is more narrow. Burton is normal. ThirtyTwo and Vans are generally wider. Each brand applies 1 or more different lacing styles and that has impact on how you get your fit.
4. Know what you're looking for: how much flex depending on your needs/ride style as number one and then maybe something else. 
5. Choose a size. Start with same number your sport shoes are. Sometimes your left and right foot maybe even have difference for half a size, don't neglect that. In most of stores they have tool that tells you which size you need if you're not sure. Some boots will expand over time, some boots will stay the same and inner boot will just adjust better, depends on boot ... make sure to ask what you can expect in term of size change over time. 
6. Compare. Try to ignore brand and style and just be fit oriented. Focus on: 
is it wide enough, 
is it long enough, 
are you comfortable since you need maybe to spend entire day in them, 
is your heel nicely cushioned and does not move when you make small movements, 
can you nicely tighten lower and upper zone with lacing system, 
are you happy with lacing system, 
does back upper of boot and liner flex enough to accommodate your calf muscle. 
7. Once you find your fit and preferred lacing system, only then focus to look into colors and style and whatever. Step #4 will depend on your feet. if it is an average feet it will be easier then if you have more wider or more narrower feet.
8. Show respect for people in store that helped you and don't go buying same boot for 10% cheaper online.
I ended up with ThirtyTwo Royal Lashed FT, size 42, check them here. Most important decisions were size change (42 instead of 42.5) and brand chnage (ThirtyTwo instead Burton due to more wider fit and more tightness around heel) We will see in few days how they will work.

Saturday, July 9, 2011

Github

For long time I am preparing to start working on some personal project/start-up - as what we all strive to eventually ... at least us in Internet based businesses.

One of the first step is to start with some infrastructure as well. I already setup some server on Amazon Cloud, but really needed full solution for Software Configuration Management with some other support features.

I was looking at following goals:
  1. Source code repository I can easily share with other people. Other considerations where my own SVN repository, Bitbucket or something else.
  2. Wiki where I can keep all code/project related information such as what needs to be done and so on. Alternative is to run some out-of-box wiki (Confluence, Mediawiki) or some other tools that has embedded wiki such as RedMine or Track.
  3. I needed some way to keep an eye on code itself and being able to perform code reviews. Alternative could be Crucible.
  4. It needed to be simple and top work well in distributed environment with people all around the globe included since this is how this might end up. So I opted more for already hosted option them me hosting it.
  5. Of course source repository clients needs to run on Windows, Linux and Mac. 
  6. I needed Issue tracking system. There are many out there. RedMine or Track have integrated ones, there is of course Jira and Bugzilla.
  7. Source code repository and code review tools need to work nice with different technologies such as Java, PHP, Ruby, C++, Objective C ...
  8. Support for simple build and deploy
  9. Minimize all the effort regarding maintenance of any kind - ideally no effort.
  10. Enable developers to work in full isolation while working on same modules - so minimal dependencies on other people's work.
  11. No complex branching, but keep support for different stages of same code and simultaneous work on same modules
  12. Think about social component of development process and maybe make it a bit more fun if possible
After some discussions with some new colleagues/friends I have decided to give it a try to Github. It is a GIT based code repository running in cloud with many other extra features on top of it. I opted for GIT vs SVN since I think I need more focus on distributed and simple. Other features simply were there so instaed of me thinking what to do and integrating many different systems, I opted for this. Main competitor was Atlassian with its own cloud and set of tools. Main drawback was that I actually did not like source code repository which it offered and tools are perfect but simply maybe a bit of too much complexity and overhead for what I need - I mean no need for Jira or Confluence realistically, i just need the simplest tool available to get the job done.

Github simply answers all my requirements and is cheap. I took cheapest plan called Micro for 7 USD per month (1 private user, 5 repos) I will give it a try, will make 3, 4 modules ... will start with some Grails module and then move to maybe Wicket, do some iOS and Android stuff and will see how it works. Will perform deploys to my Amazon server via Capiostrano. If I involve some other people will have to upgrade account to Small for 12 USD per month. Well, if I need developers I will have extra 5 USD per month I guess to invest.

Thanks to Nicola Paolucci with whom I discussed about this and who pushed me toward this decision.

Thailand Adventure - Art of Packing

D-day
This assumed lot of preparations since it was not a regular trip ... it was a scuba diving trip ... not even a regular scuba diving trip ... a scuba diving trip with significant amount of underwater photo equipment ... which means simply Hell and requires Art of Packing.

Luggage considerations
One needs to put a lot of gear in limited space, by volume (1 bag + 1 piece of hand luggage) and by weight (whatever airlines says - usually 32 kg for long destinations and 23 kg for short destinations). It ended up me being lucky since I got from Turkish Airlines luggage allowance of 32kg for Amsterdam to Bangkok. Rest of the people who were traveling from Belgrade (Serbia) got only 23kg .. so this saved the day. Apart from weight concept, some companies also have piece concept, where 32kg let's say applies only to 1 bag, so you cannot have 2 bags with total of 32kg, while some just have weight concept. This is what one needs to consider when choosing flight.

MAKE SURE YOU ALWAYS ASK WHAT ARE THE LUGGAGE LIMITATION, WHICH CONCEPT APPLIES NO MATTER WHAT IT SAYS ON WEB SITE AND HOW MUCH OVERWEIGHT EXACTLY COSTS.

This is important since it can eventually influence your end price ... even drastically. So, don't chase just cheapest flights ... always consider the luggage limitations and airline company friendliness to hand luggage concept.

Art of Packing
I had to ditch hard cases for photo equipment and somehow pack it all up in one 32 kg bag (with wardrobe and scuba dive gear) and in hand luggage. So here it is how it ended up plus some ideas how to reduce it in future. We additionally had to take another flight from Bangkok to Phuket with Air Asia (I think this is at least like that if you travel to Southeast Asia since all good dive sites are far away from mayor airport hubs). For this flight we had in advance bought extra baggage allowance since we knew we will need it. Air Asia is sort of low cost company in that part of the world (according to European standards, more like SAS then like low cost since they only charge food and drinks on-board per my opinion). Trick here was to buy simply extra 10kg per person classified as general luggage and not to choose option Sport gear, since Sport gear option for some reasons costs much more. Also on check-in we kept quiet about diving equipment.

ADDITIONAL CONSIDERATION IS TO CONSIDER OTHER LOCAL FLIGHTS APART FROM MAIN INTERCONTINENTAL FLIGHT SINCE THESE SECONDARY FLIGHT USUALLY HAVE OTHER LUGGAGE LIMITATIONS.

Big case 
Dive gear
  • Cressi Rondine A fins
  • Cressi booties
  • Cressi mask (took one only to save some space)
  • Snorkel - foldable for BCD jacket - I am fan of snorkels and never go into water without one. Will not say it saved me many times, but can confirm that I was very happy I had it on several occasions when I had to wait for boat in wave sea.
  • Scubapro MK17/S550/R295 regulator with console (I was thinking of something a bit more light weight, but will stick with this for at least couple of more trips until I can field test something of good quality but lightweight). Also considering ditching octopus and use combo of inflator and regulator instead - Scubapro AIR2, but will have to think more, somehow I prefer to have octopus so I can assist someone.
  • 3mm full suit (ended up like a waist of space since eventually ended up diving in rush-guard and boardies). My advice for March in Thailand (and July, August in Egypt) is not take even shorty ... trust me.
  • Zeagle Ranger BCD (need to consider something more light weight for distant tropical water trips where I know buoyancy will  not be an issue and easy dives are expected)
  • Uwatec Smart PRO - battery died when I go there so my advise for anyone is  not to go on trip with less then 60% of battery ... I think I had 58% in Amsterdam
  • BCD jacket knife - no need for even medium size knifes ... when I think better I never had a need for a knife at all :-)
  • Intova Mini Torch - LED pocket lamp - no need for anything bigger. 
Photo gear
  • Ikelite housing for D70s
  • Handles and bar for Ikelite housing and Nikonos V
  • Strobe arms for Ikelite housing and Nikonos V
  • 8'' dome Ikelite port with cover and port ring
  • Some small tools, o-rings, grease, spare parts ...
  • 8 rechargeable ENELOOP batteries + charger (I think will need 12 at least on next trip - to have 4 spare)
I ditched old Mares trolley bag which was great but was too heavy - around 5kg empty. Instead I got  regular Eastpack bag with volume big enough with wheels and bar which weights less then 3kg so I spared 2 kg here + made myself less suspicious.

Wardrobe + other stuff
On top of this I put minimal set of wardrobe required with assumptions I'll bay some extra t-shirts in Thailand (as I always do on any trip anyway) and simply put them in extra plastic bag on my way back. i guess girls are a bit more demanding ... so what can I say ... my main advise is to consider where one is traveling, to think about last trips and really simply ditch what is not needed. For example jeans and long pants - these are simply not needed. Jacket is really not needed, hoody is more then enough, figure out that somebody drives you to airport if winter in your part of world. I travel in sneakers ... no 2nd pair of sneakers in bag ... really no need for that.

Simply make a list of unused items from last trip and automatically ditch them. 

Books ... 1 book maybe and shift to e-books.
Notebook - only if you really need one. Why would one need to bring notebook on vacation. Emails ... you got your smartphone anyway if you're so notebook dependent. Late night movie/tv series - no, just get some sleep or enjoy local night activities. Music - get an mp3 player. Lot of images, get enough memory cards. Believe me, no need for notebook in more then 95% ... think about it.
Minimal medical kit + personal care items. I always buy new stuff in local stores such as shower gel, toothpaste and so on ... no need to care those items with you. 

I put myself limitation of 30kg when measured at home since I assume at airport the weight simply more. To be honest in Amsterdam it was fine, but in Phuket, it added around 2 more kilos compared to Amsterdam for same bag.  So, never hit the limit, always leave 2 kg as spare just in case someone is wrong. And of course - prepare credit card if needed. I personally always make a peace with my destiny that I will need to pay something and if I don't, I am happy.


Hand luggage
  • Nikon D70s body (goes into Ikelite housing)
  • Nikon D700 body with 50mm f1.4G (for land only, new Sea and Sea rig on its way so next trip is FX underwater finally)
  • Nikon 16-35mm f4 (FX lens - for land only)
  • Tokina 11-16mm f2.8 (DX lens - my main underwater lens for D70s)
  • Nikonos V body (yes, I know, but I like film ... it is simply great and makes you think a lot)
  • Sea & Sea 15mm f3.5 lens for Nikonos V (my main underwater lens for Nikonos V - in the mean time I got Nikonos 15mm f2.8)
  • Sea & Sea viewfinder for 15mm lens
  • Nikonos SB-105 strobe
  • Ikelite DS-161 strobe
All this did fit Lowepro Stealth Reporter D400AW. On top of this gear I tucked in also couple of small Thailand guides, backup t-shirt (always have one when traveling), dive c cards and logbook. I highly recommend this bag as a hand luggage. It is not too big so it's not suspicious, but it is very spacious. I think I had around 10 kg in it and nobody checked that so I was fine. When I think more, nobody ever asked me to weight my hand luggage so i guess this will be my strategy for next trips as well.

All liquids go to big bag to avoid any kind of hassle on airport security ... that includes Swiss knife also.

Summary
I was very mobile with all gear since only 2 bags, big one on wheels + hand luggage, so I highly recommend this concept with 2 bags only. If I did not had photo gear, I could fit into 23kg easily with lightweight hand luggage. Who has more should reconsider this approach and is all he takes really required.

Improvements for future
  • Consider more compact BCD
  • Consider more compact regulator
  • Don't take wetsuit if not needed
  • Streamline photo gear by ditching D70s and building rig around D700 (Sea & Sea housing is on its way as we speak :-))  
  • Use more compact strobes - Inon Z240 or Sea & Sea 110a instead of Ikelite 125/160/161 when possible. These strobes use regular AA batteries, while Ikelite uses heavy rechargeable battery.
  • Consider skipping Nikonos V rig when focusing on digital photography on some workshops.
  • Ditch that 1 book also and fully move to e-books while on vacation - still not using full potential of my Sony Reader.
Special Thanks
Special thanks to Predrag PECA Radifkovic for setting up this trip, being excellent group leader and considering all the luggage limitations and finding solutions for them. 
Also thanks to Dr. Nenad Dikic who took care of Air Asia extra luggage and made good decisions there and also assisted during check-in. 
Finally we also had our own tourist guide, Dejan Maksimovic who assisted with local transports and everything else - his role will be starred couple of more times in this Thailand series of posts.


Keep following the adventure - next stop is Bangkok.
 

Monday, January 31, 2011

Thailand adventure can begin

I have decided to undertake a small media experiment and try to fully document my next adventure - diving in Thailand. I will document preparations and trip itself. All material will be published on this blog as time goes on. Goal is to try to produce a nice trip report with enough information and related media to be used by maybe some other media channel or people interesting in similar trips.

Trip is organized by Predrag Peca Radifkovic from Diving Club Sebastian from Belgrade, Serbia and is a nice mix of diving and relaxing. Most of us are visiting Thailand and Asia for the first time. Our diving experience comes from diving in mostly Adriatic Sea and Red Sea so we are quite familiar with warm sea diving. It is a mix of diving and relaxing since sometimes when ones goes on so distant travel it is a shame if only diving is involved and no other time is spent on exploring more local place and learning and enjoying in it for some time on "regular" way also.


Travel plan:
26. 02. 2011.
- Arrival to Bangkok and staying overnight in hotel
27.02. 2011. - Flight to Phuket + mini van from Phukhet to Khao Lak (90km) where we get embarked the ship a.k.a. live-a-board
27.02. 2011. - 05. 03. 2011. - We stay onboard for 6 days and from here we dive and cruise around world famous Similan islands.
05. 03. 2011. - Ship gets to Khao Lak in afternoon hours and we take the mini van to resort in Phukhet.
05. 03. 2011. - 10.03.2011. - Chilling and enjoying in Phuket.
10.03.2011. - Return to Bangkok and staying overnight in hotel
11.03.2011. - Departure from Bangkok in early afternoon hours

For this trip we're flying with Turkish Airlines and their hub is in Istanbul.

Next post will put more details around ship and diving plan.

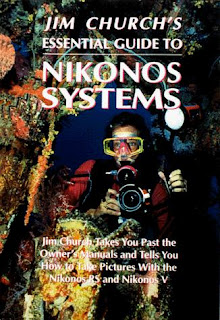
Book review: Jim Church's Essential Guide to Nikonos Systems


I started with this book as next best resource after official user guide in my adventure with Nikonos V underwater camera.

It is old book, hard to find these days but it contains essential information not only specific about Nikonos systems, but on overall underwater photography set of topics. I can say that decent part of book is dedicated to flash photography, both manual and TTL based.

Book contains many color and BW images that very descriptively explain all material that writer offers to readers.

Entire book contains many useful advises where writer explains some realistic situation and then offers a solution. Believe me, you will have all those situations.

I highly recommend this book for any underwater photographer: to those who are just starting and to those who don't understand why their TTL is not perfect.

Friday, April 2, 2010

Nikonos V - going old school

Couple of years ago I lost my digital camera (Sony W7) with underwater housing on one of the dives (Tihanny, Herceg Novi, Montenegro) and that is when my underwater photo adventure stopped.

From than, I have been discussing various options on how to proceed with underwater photography with some of my friends, following various discussions on Internet and decided that I should go both old school and digital.

Last couple of years I see lot of people with compact cameras in underwater housing who produce massive amount of photos on every dive, but rarely really an excellent photos are produced. Due to big capacity of memory cards, divers are sucked into this spiral of shoot-as-many-as-you-can-since-no-limit-on-space-you-have violence. Also, they don't go into technical details that make photography like exposition, aperture, shutter speed, sensitivity, metering and all those things that make one produce photography he wants.

So, I have decided to polish mu photography skills by taking an old Nikonos V. Major influence on this decision was put by my good friend, my diving instructor and excellent photographer Vladan Milisavljevic. So what did I get?

I got a Nikonos V orange body in pretty good shape. With body I got U/W 35mm and U/W 28mm Nikkor lenses. Then I bought Nikon underwater flash SB-105 with necessary arms to connect it to camera. And finally I got Sea & Sea 15mm lens with appropriate viewfinder.

Nikonos V introduced lot of changes when compared to Nikonos III and IV, but from technology perspective even at that time was very simple and Nikon had much more advanced models out there. Nikonos V is not an SLR and requires viewfinder for framing the shoots. Build in covers 35mm and 28mm, but other lenses require specific viewfinders. Camera itself is very small and compact. It contains 2 sensors for measuring, one is used for TTL flash and another is used for build-in exposure meter - you set the aperture and camera chooses shutter speed. It contains easy to replace battery and does not require any specific training.

Camera itself contains 4 user maintainable o-rings which cover all user removable parts: battery, flash connector, lens and camera back. On top of this, Nikonos also contains a set of non-user replaceable o-rings which can be replaced by skilled repairman. Problem is that now there are no many left, but I will think about that in 2 years I would say.

Fair price for body and 35mm and 28mm lens is around 250 - 300 USD.

U/W 35mm and U/W 28mm Nikkor lenses are pretty much basic lenses which are cheap but not so useful for me or most of people who are not in macro photography. I think I will not even try 35mm and will use 28mm when trying to do something else then wide angle shoots. Underwater photography is specific and there is one simple rule: in order to get good photos, you need to get close to the subject. This is due to fact that water between the lens and subject is far from being good medium when compared to air and introduces lot of side effects even if visibility is great.

Due to this I decided that I must have a solid wide angle lens if I really want to capture some good shoots. Nikon produced also 20mm and 15mm lenses but those are even today still very expensive believe it or not. There were also 3rd party lenses and Sea & Sea is the company which after Nikon produced most of other Nikonos lenses. So I have decided to go for Sea & Sea 15mm and got myself also a viewfinder that goes with it. I payed for this around 250 USD and think it is worth more when I look at some European prices.

For those who did not know, when diving and going down in depth, colors start to disappear. Red is the first one that disappears and finally you're left with blue and gray at 40m and below. Due to this fact, in order to capture all those crazy colors, one needs to have an underwater flash. Alternative is to use filters, red filter for example, but that is just a way to deal it and not a good replacement. So, I opted for SB-105 which is pretty good flash and people are using it today with digital cameras as well. This is one of the latest Nikon underwater flashed and I thing it came out when Nikonos RS came out (underwater amphibious Nikon SLR). Beside TTL control it offers several other modes, like manual and slave which can be used for many different reasons.

Finally I got Nikonos V user manual and Jim Church's Essential Guide To Nikonos System book which is the bible for Nikonos.

Reading these materials an talking to Vladan made me feel capable of taking nice shoots and in 2 weeks from now I will be in situation to do so since going back to Red Sea on live-aboard adventure which will cover northern region of Red Sea and lot of famous wrecks where I hope my 15mm lens will do it's best. Drawback will be that I will develop all images when I get back since I will be living on a boat so it will be a true challenge to get some good photos when you cannot preview what you did. Due to that I will have 2 practice dives in a pool with Nikonos so I can take some test shoots, get images and analyze them before I hit the road.

Final important decisions is choosing the films and type of films. I have decided to take most of shoots with negative films due to first trip with Nikonos. Negative is capable of better handling the inappropriate exposure and comes with higher sensitivity. i plan to take a loot of "in-blue" shoots and shots of wrecks with maybe only some details exposed to flash. Anyway, will pack up couple of slide films just to try that as well. Choice has come to Fuji film and their selection of films which I will probably get in Calumet store here in Amsterdam.

Wish me all the best and when I come back, I will share what I managed to accomplish.

Finally, I would like to thank Vladan for all the effort he has put to get me ready for this adventure.

Arduino - what's it all about?

When I got to Blast Radius, one of my new colleagues shared with me (thanks Oscar) that he was working something with Arduino. At that point I had no idea what Arduino is. I got interested and decided to look into it.

So, it looks that new era has begun where people who never thought would dig into electronics and assembly something made of electronic components are actually starting to build some let's call them devices.

Arduino is a platform that consist of hardware and software. Hardware assumes microprocessor and prototype board, while software assumes SDK for Arduino specific language which is based on Wiring which looks pretty much as any other OO programming language from core language perspective. You will notice that Wiring also
has its own hardware platform so we can say that Arduino and Wiring are pretty much similar concepts. Both of them are targeted to people with no formal electrical engineering interests like architects, designers, artists ...

Arduino hardware is manufactured in Italy and consists of several options which vary in version of microprocessor and some details and size of proto board. Microprocessors come from ATmega family and in general were not familiar to me based on what previously I had chance to see in electronics stores. Proto board brings everything necessary do download the program from computer down to microprocessor. These days that is done by embedded USB port on proto board. Proto board distributes all control ports of microprocessor to appropriate pins on top of the board.

Apart from this basic hardware, a set of other hardware add-on is available in what is known as "shield". So, you can get Bluetooth, Wi-Fi, Ethernet and so on. So you simply buy additional board and connected it with basic Arduino proto board and voila.

Programming is simple. OK, I get money for living by developing software, but this is really easy. Per my opinion, requires elementary and basic computer skills school and suitable for kids as well.

This is perfect companion for winter days, when once want to play a bit. Also, prototyping new concepts in some creative environments where people are trying to define new interaction, bring new ideas is core idea behind this.

Arduino can be bought online in lot of online stores that ell electronics and I would say can be found pretty much across EU. Price varies from around 35e for basic model to around 100e for advanced models in kit with lot of passive electrical components like resistors, diods and some auxiliary components like switches, motors, wire ...

One can digest all there is on this topic in couple of weeks so no purpose on writing more ... get your board, get some tools, find some time and have a good time :-).